
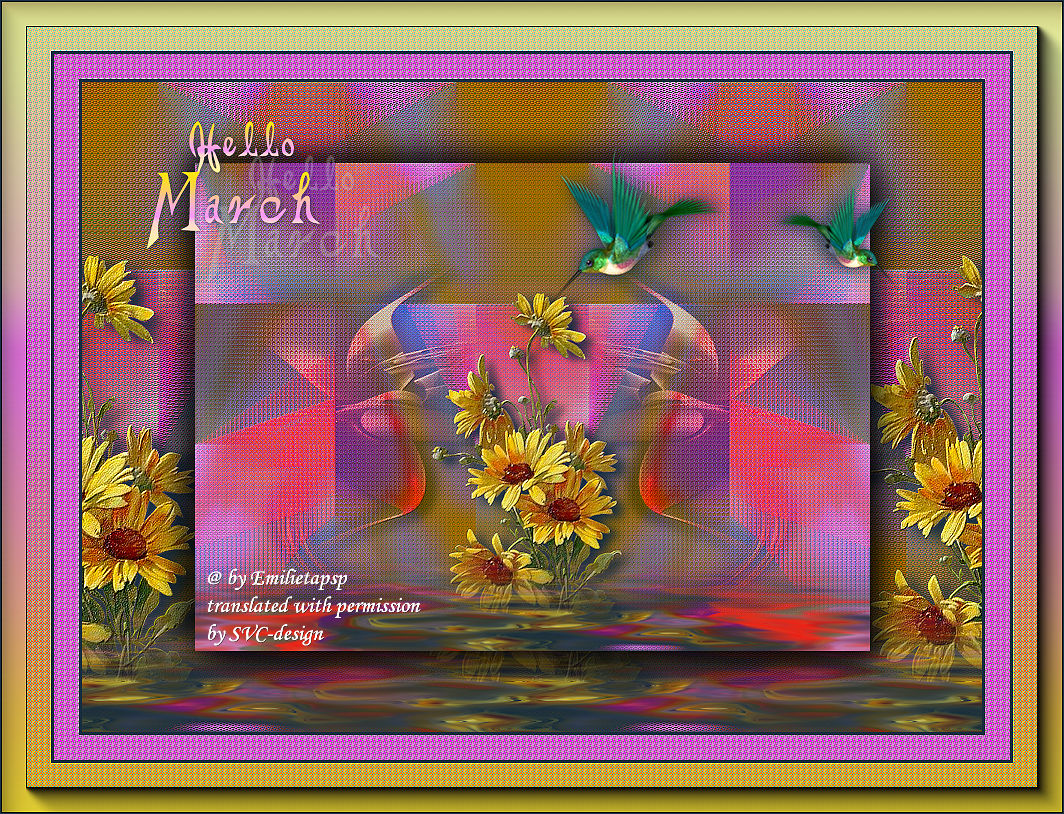
This lesson is made with PSPX9
But is good with other versions.
© by SvC-Design
Materialen Download :
Here
******************************************************************
Materials:
Colibr¦.png
masque_5_franiemargot.jpg
rn-lagopus.ttf
Sol-3.PspGradient
Suelo-1.jpg
Texto.png
Yellow Daisies_LR-3-16-18.png
******************************************************************
Plugin:
Plugin – Medhi - sorting Tiles
Plugin - FM Tile Tools - Saturation emboss - default
Plugin - FM tile Tools / Blend emboss - default
Plugin - Flaming Pear – flood
Plugin - AAA Frames - Fotoframe
******************************************************************
color palette
:

******************************************************************
methode
When using other tubes and colors, the mixing mode and / or layer coverage may differ
******************************************************************
General Preparations:
First install your filters for your PSP!
Masks: Save to your mask folder in PSP, unless noted otherwise
Texture & Pattern: Save to your Texture Folder in PSP
Selections: Save to your folder Selections in PSP
Open your tubes in PSP
******************************************************************
We will start - Have fun!
Remember to save your work on a regular basis
******************************************************************
1.
Open a new transparent image of 900 X 600 pixels
2.
We must have the color palette like this: But we paint with the gradient that I send you,
NOT with the one that these two colors form, since the gradient is interspersed with another shade of yellow.
In the color palette, we put the color # e6d43c in the foreground
Background color #ffffff (White) (this is so that the color gradient does not change)
fill your canvas with gradient
3.
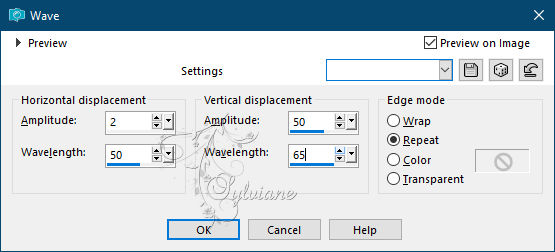
Effects - distortion effects - wave
4.
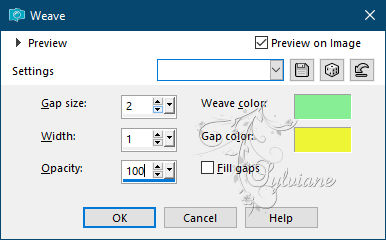
Effects - Texture Effects - wave
5.
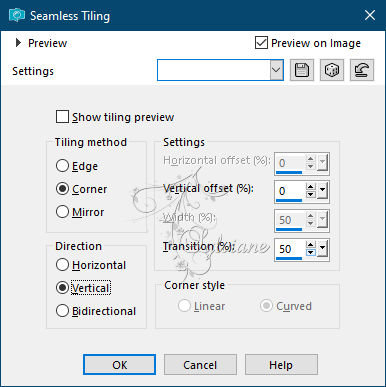
Effects - Image Effects - Seamless Tiling
6.
Effects - Edge Effects - Enhance
7.
Layers - Duplicate
8.
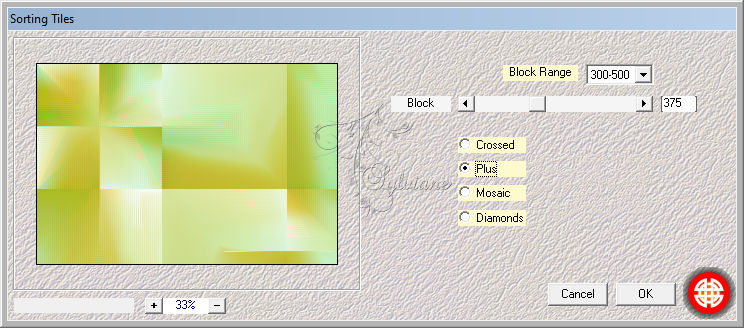
Plugin – Medhi - sorting Tiles
8.
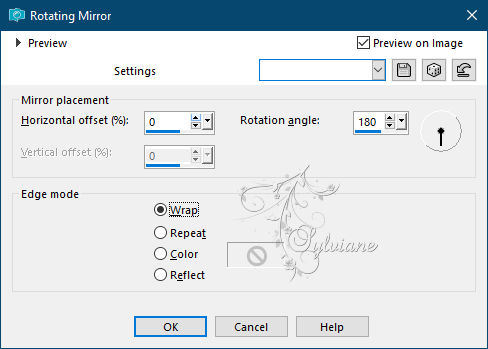
Effects – reflection effects – rotating mirror
Blend Mode: difference
9.
Opacity: 55%
10.
Layers - Merge - Merge visible layers
11.
Layers - New Raster Layer
12.
Fill with:#ffffff
13.
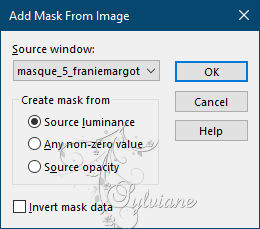
Layers - New Mask Layer - From Image - masque_5_franiemargot.jpg
14.
Layers - Merge - Merge Group
15
Resize to 85%
16.
Effects - Image Effects - Offset
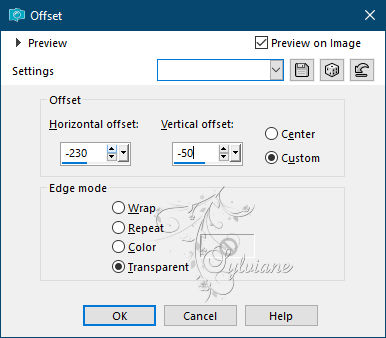
17.
Blend Mode: Overlay
18.
Layers - Duplicate
19.
In layer mode we put Hue
20.
We activate Group - Raster 1
We continue in this layer
21.
Effects - 3D effects - Drop shadow
1/1/60/2 color # 172e41
Repeat dropschadow
-1/-1/60/2 color:#172e41
22.
Effects - 3D effects - Drop shadow
6-12-100-20 color # 172e41
Repeat dropschadow
- 12-6-100-20 color # 172e41
23.
Layers - Merge - Merge visible layers
24.
Layers - Duplicate
25.
Image - Mirror – mirror Horizontal
26.
opacity to 50%
27.
Layers - Merge - Merge visible layers
28.
Plugin - FM Tile Tools - Saturation emboss - default
29.
Open Yellow Daisies_LR-3-16-18.png
Edit – Copy
Edit - Paste as new layer
30.
Resize to 75%
31.
Effects - Image Effects - Offset
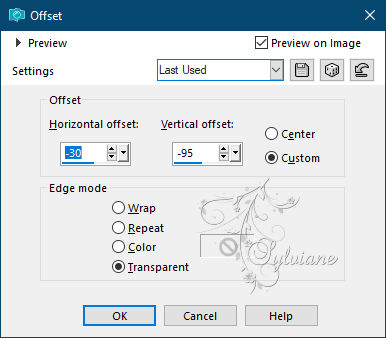
32.
Plugin - FM tile Tools / Blend emboss - default
33.
Effects - 3D effects - Drop shadow
6-12-100-20 color # 172e41
34.
Layers - Merge - Merge visible layers
35.
Layers – Load/save mask – Load mask from disk - Suelo-1.jpg
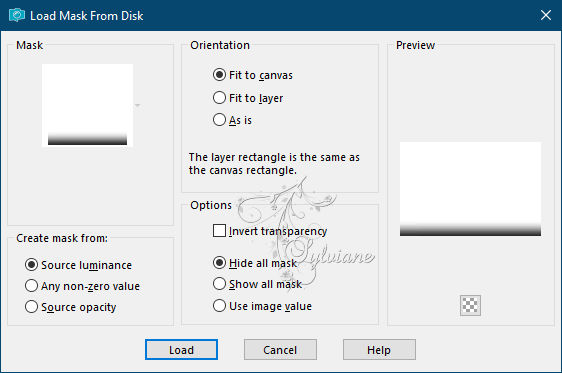
36.
Layers - Merge - Merge Group
37.
Image - Canvas Size
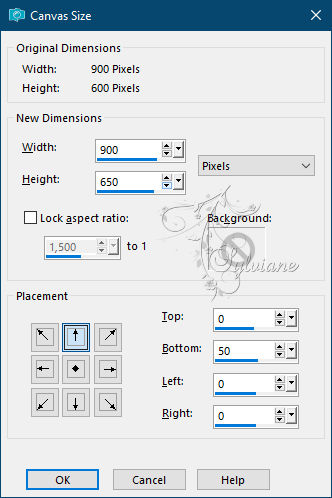
38.
Layers - Duplicate
39
Image - Mirror – mirror Horizontal
Image - Mirror - Vertical Mirror
40.
Layers – Arrange – Send to Bottom
41.
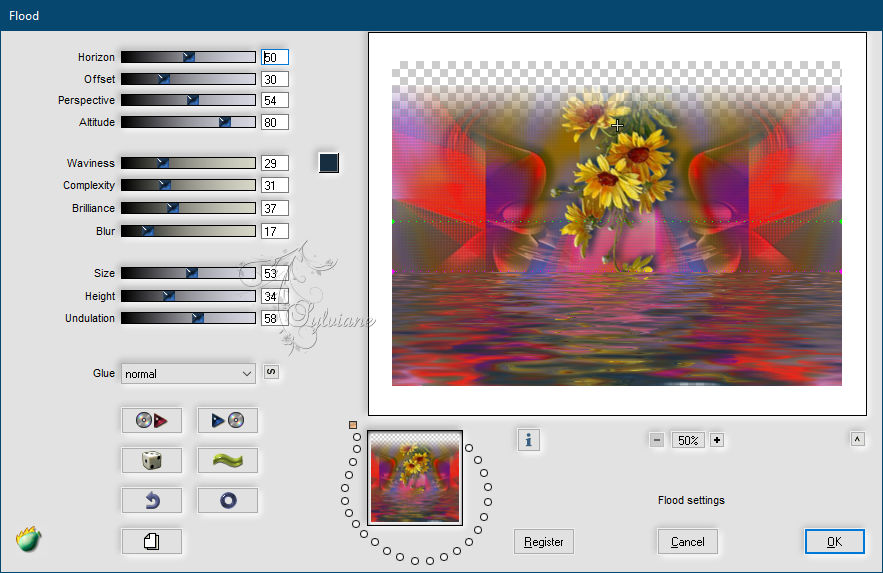
Plugin - Flaming Pear – flood : color # 172e41
41.
activate the merged Group
42.
Layers - Duplicate
43.
Image - Mirror – mirror Horizontal
Image - Mirror - Vertical Mirror
44.
Layers – Arrange – Send to Bottom
45.
We will have this:

46.
Layers - Merge - Merge visible layers
47.
Adjust - Sharpness - Sharpen
48.
Layers - Duplicate
49.
Resize to 75%
50.
Effects - 3D effects - Drop shadow
10 / 10 / 100 / 40 color:#000000
51.
Repeat in negative
52.
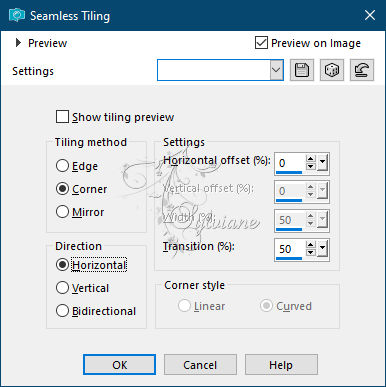
We activate the merged plot
53
Effects - Image Effects - Seamless Tiling
54.
Open Texto.png
Edit – Copy
Edit - Paste as new layer
place it as in the model
55.
We lower the opacity to 75%
56.
Open Colibr¦.png
Edit – Copy
Edit - Paste as new layer
place it as in the model
57.
Layers - New Raster Layer
We put our signature
58.
Image - Add Borders - symmetrical - 3 pixels color # 172e41
59.
Image - Add Borders - symmetrical - 25 pixels color # e78bdc
60.
Image - Add Borders - symmetrical - 3 pixels color # 172e41
61.
activate magic wand
We select with the rand
62.
Effects - Texture Effects – wave - as before
63.
Effects - Edge Effects - Enhance
64.
Selection - Select None
65.
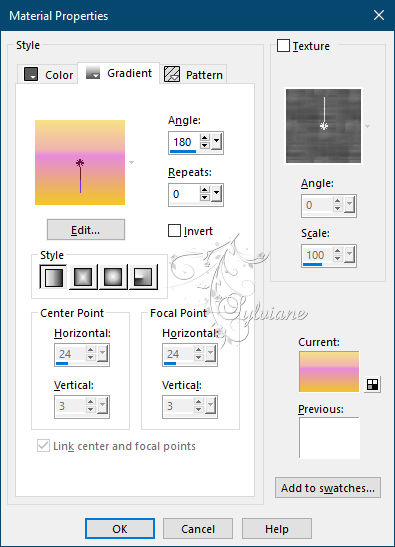
Let's go to the gradient and change the white background color to this # e78bdc
We will have a new gradient like this:
66.
Image - Add Borders - symmetrical - 50 pixels, foreground color
67.
Select with the wand
Paint with the new gradient
68.
Effects - Texture Effects – wave - as before
69.
Effects - Edge Effects - Enhance
70.
Selection - Select None
71.
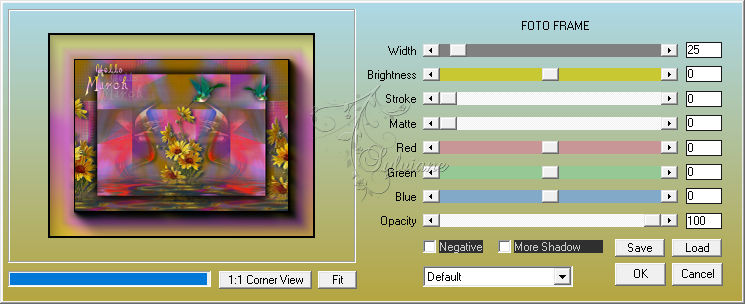
Plugin - AAA Frames - Fotoframe
72.
Image - Add Borders - symmetrical - 1 pixel - color # 172e41
73.
Adjust - Sharpness - Sharpen
74.
Save as JPEG
Back
Copyright Translation © 2021 by SvC-Design